A bootable pen drive is helpful in multiple ways, ranging from installing operating systems, troubleshooting system errors, and running various utilities. However, after utilizing it for that specific task, it is important to revert it to a standard storage device so you can use it as regular file storage. There are multiple ways available that you can try to convert a bootable pen drive to a normal one.
This guide will cover the reasons why you should convert a bootable pen drive back to a normal one along with step-by-step instructions on how to convert a bootable pen drive to a normal one. Let’s get started!
Why Convert Bootable Pen Drive to a Normal One?
Converting a bootable pen drive to a normal one is helpful in multiple ways, some of which are:
- Extend Storage Space: Bootable pen drives have reserved space for system files, reducing available storage for everyday use. When you convert it to a normal drive, it frees up this space.
- Reuse for Regular Data: Once you complete tasks like OS installation or system repairs, you can use the pen drive for regular data storage and transfer.
- Simplify File Management: Bootable drives have complex partition structures which makes file management quite difficult. Converting the drive to a normal one simplifies its structure, making it easier to use for general purposes.
Quick Methods to Convert a Bootable Pen Drive to a Normal One
Just go with the step-by-step instructions mentioned in this part of the blog to convert a bootable pen drive to a normal one:
Method 01: Use the Format Option in My Computer
It is one of the most common methods to make a pen drive a normal one, i.e., to return it to its original state. All you have to do is:
- Firstly, connect your bootable pen drive to your computer’s USB port.
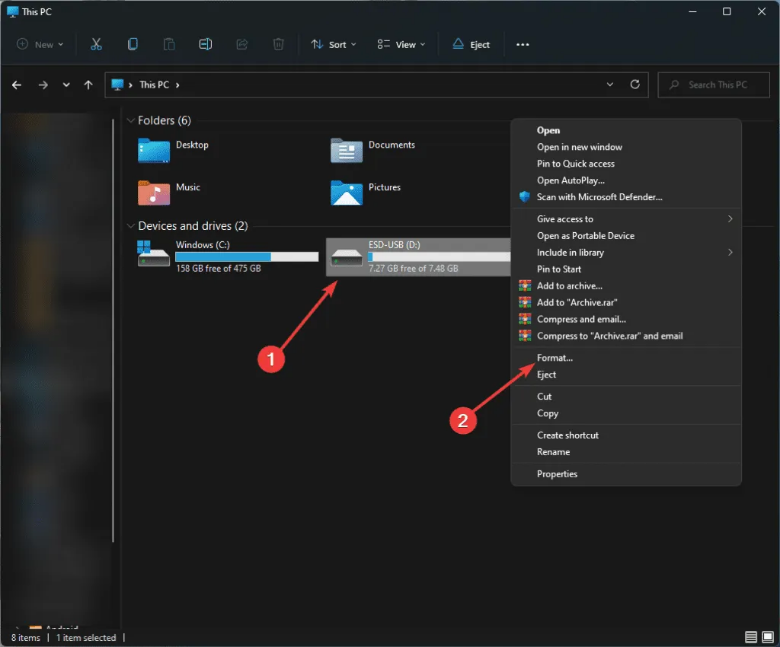
- Open My Computer and right-click on your USB drive that you need to configure or unboot. Select the Format option from the menu that appears.
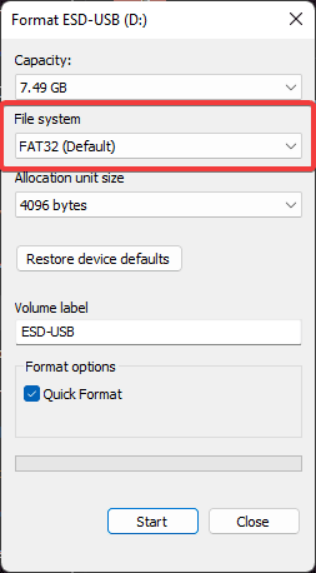
- Now, choose the FAT32 option from the drop-down menu next to File System.
- Also, select the checkbox next to Quick Format. Click OK on the pop-up window that appears.
- Wait till your USB begins to be formatted to the FAT32 file system. Once finished, you will see the message Format Complete.
Method 02: Use Command Prompt on Windows
Windows in-built Command Prompt (CMD) utility allows you to manage partitions, format drives, and perform other disk-related tasks. You can even convert a bootable pen drive to a normal one using CMD. For this:
- Insert your bootable pen drive into your Windows PC.
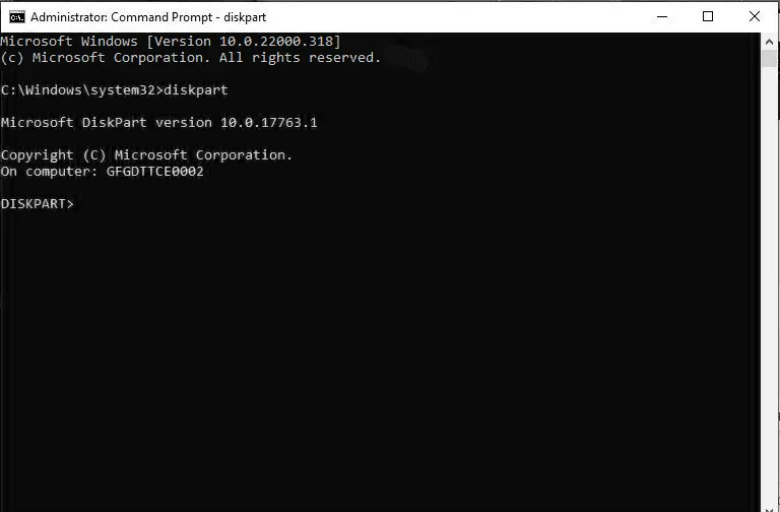
- Type CMD in the Windows search box, right-click on Command Prompt and choose Run as administrator.
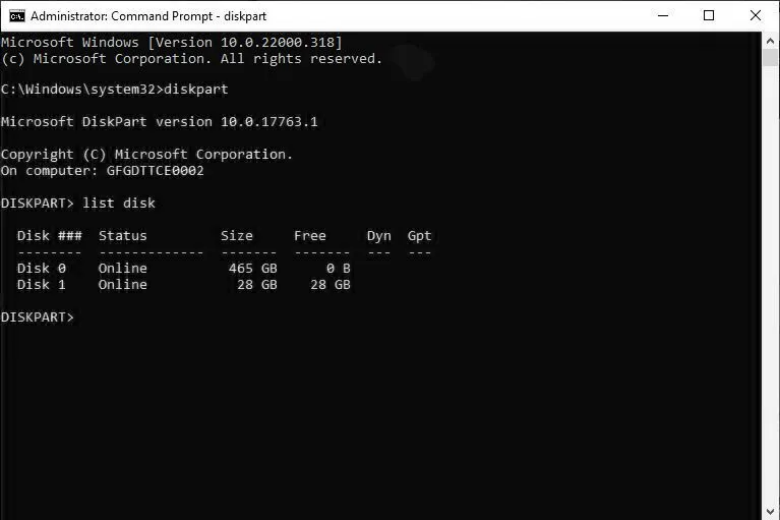
- Now, type Diskpart in the Command Prompt window and press Enter key to launch the Diskpart utility.
- Type List disk and press Enter (this command will display all your connected drives).
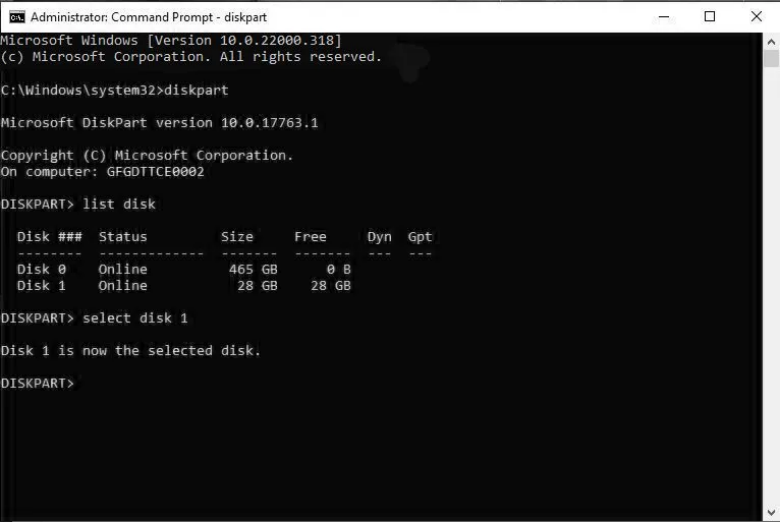
- Type the command: Select disk X (replace X with the number corresponding to your pen drive) and press Enter.
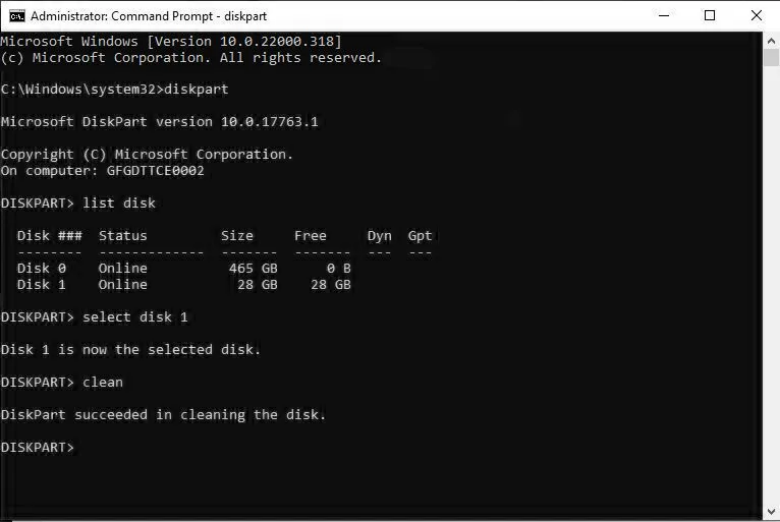
- Type Clean and press Enter to remove all partitions and data from the drive.
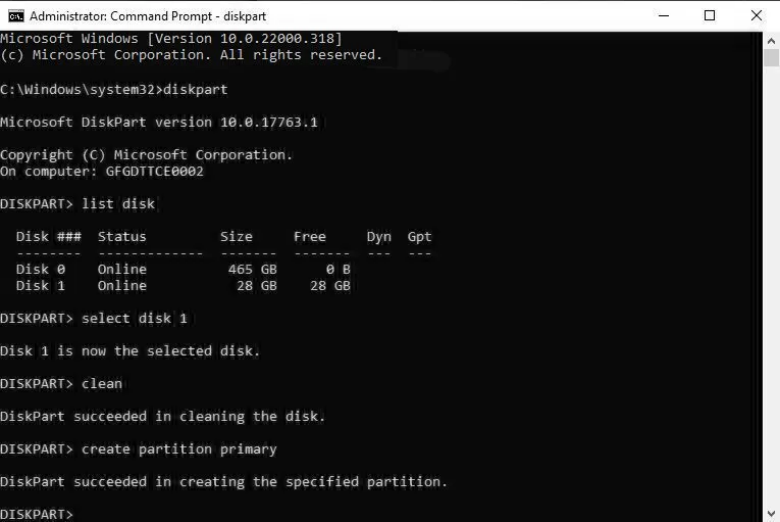
- Input create partition primary and press Enter (this command creates a new partition on the pen drive).
- Type format fs=fat32 quick (or exFAT for a different file system) and press Enter (This command will format the drive).
- Lastly, type assign letter=X (replace X with your preferred drive letter) and press Enter.
Once you are done with the above steps, type the command: exit and press Enter to close the Diskpart utility. Your pen drive is now converted back to a normal storage device.
Method 03: Use Disk Utility on macOS
You can also use macOS in-built Disk Utility to format your bootable pen drive and revert it to a regular storage device. For this:
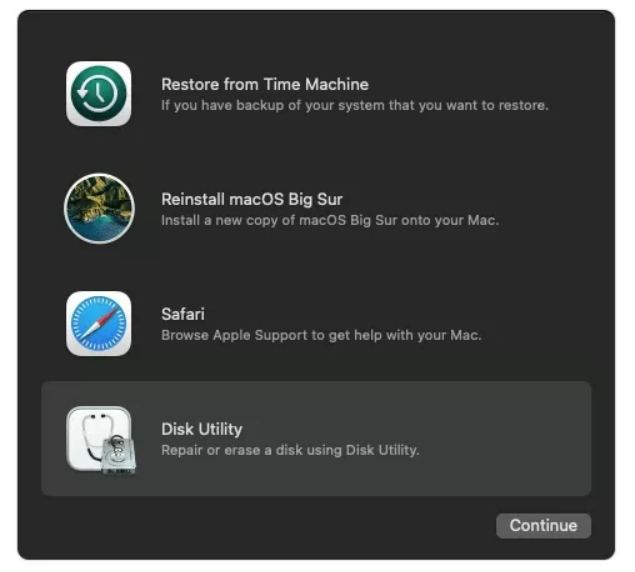
- Press the Command + Space keys to open the search box, then type Disk Utility to launch this software. Alternatively, you can use the Launchpad icon on your Dock to open the Disk Utility app.
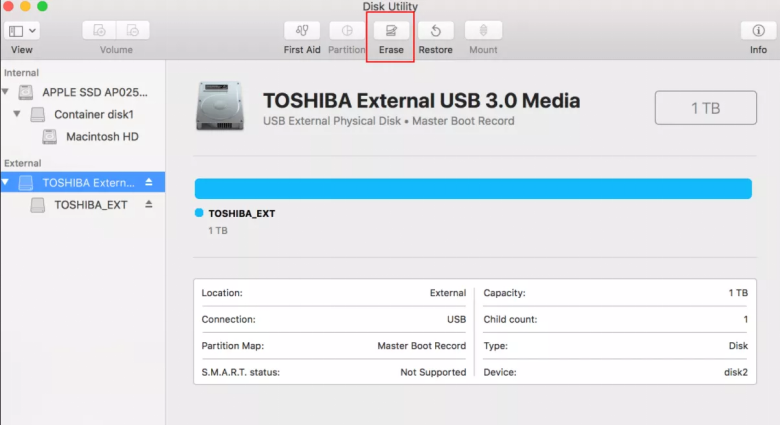
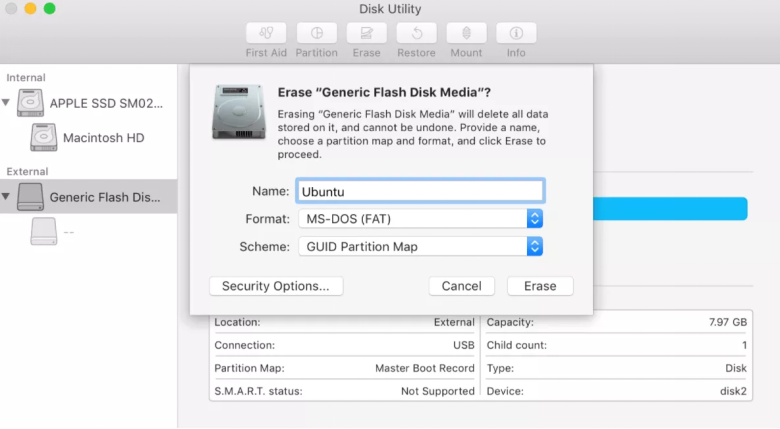
- Now, select your bootable pen drive from the left-hand sidebar and click the Erase button.
- Choose “MS-DOS (FAT)” from the drop-down menu next to the format option and then confirm this formatting. Wait till the process is completed.
What If Data Loss Occurs While Converting a Bootable Pen Drive to a Normal One?
Instances may occur when you lose important data on your Windows or Mac device while applying the above steps of converting a bootable pen drive to a normal one. There are several manual methods as well as professional data recovery software available online that you can try to restore your lost data. When you encounter a data loss issue on your device during the conversion process, it is good to immediately proceed with an adequate recovery workaround.
Tools like Stellar Data Recovery Professional allow you to recover data deleted due to any reason, including accidental deletion, formatting, virus attacks, etc. You can easily restore lost or deleted photos, videos, documents, and other types of files using this all-in-one professional data recovery software. This software is known for various amazing features, including:
- Supports recovery of data from any storage device, including hard drives, USB flash drives, SD cards, SSDs, cameras, etc.
- 100% safe and secure data recovery software with a high success rate.
- Compatible with both Windows and Mac PC.
- Supports recovery of data from completely crashed & unbootable systems.
- Recovers data from NTFS, exFAT, and FAT formatted drives.
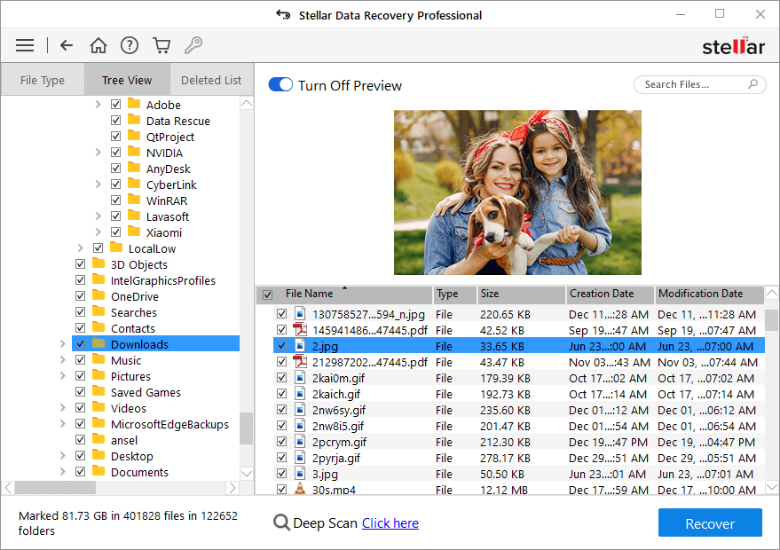
- Allows you to preview the recoverable files before saving them on your device.
Steps to Recover Lost Data After Converting your Bootable Pen Drive to Normal One using Stellar Data Recovery Professional Tool:
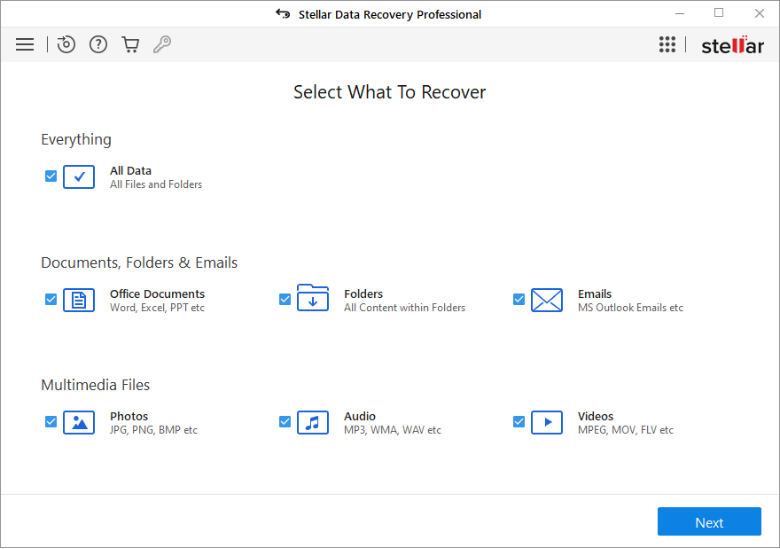
Step 1: Download and install the Stellar Data Recovery Professional software on your Windows/Mac device. Select the type of data you need to restore and click Next.
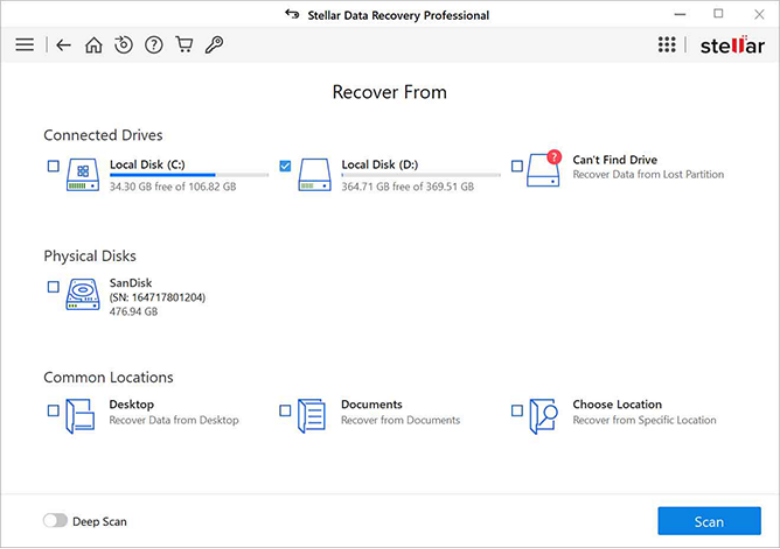
Step 2: Now, choose the storage location or drive where your deleted data was earlier stored and click Scan.
Step 3: After completion of the scanning process, preview the recoverable files and choose the ones you need to restore. Click the Recover button to save selected files at the desired location.
Conclusion
Converting a bootable pen drive back to a normal storage device is a simple yet effective process. You can use built-in tools like File Explorer, CMD, Disk Management, etc. to help you format the drive and convert it to a normal one. However, sometimes you may encounter data loss issues on your pen drive after executing the above conversion process. In such cases, you can use a professional data recovery software like Stellar Data Recovery Professional to get deleted data back. Moreover, consider preventive measures like maintaining regular backups, avoiding data overwrites, etc. to prevent future data loss.


